Commons:Wiki Loves Heritage 2018 in Belgium/Photo tips
| For individuals | Photo tips | Contribute to Wikipedia | For organisations |


Adapted from Museum photography tips:
Museum photography involves producing photographic reproductions of objects on display in museums: utilitarian objects, 2D or 3D works of art. This is of capital importance for enriching Wikimedia projects, but involves difficulties of a technical, legal and psychological nature.
Technical tips[edit]
As it involves faithful representation of fixed objects, museum photography is close to studio photography, especially in the intended aim: a "perfect" image, as sharp as possible and as high resolution as possible. A slightly unsharp action photograph would be acceptable, but an unsharp museum photograph is best avoided. High quality museum photography is difficult without an appointment, special lighting and open displays, but it is possible.
Light[edit]
Most museums use a dimmed light, for the visitors’ comfort and for preservation issues, which requires specific tools and settings to make the pictures sharper.
In general, lack of light can be compensated in four ways:
- Artificial lighting such as flash or studio lamps. This is usually forbidden in museums to avoid the potential deterioration of fragile pigments and to preserve the comfort of the public, and is difficult to use, especially in the context of a museum with display glass everywhere. Using other techniques is thus recommended.
- Opening the lens aperture diaphragm wider. A larger aperture like f/1.4 will usually allow enough light through during an open shutter duration that is brief enough to reduce capturing subject or camera/photographer movement, even in the low lighting of a museum, but this may yield an unacceptably narrow depth of field focus, especially for three dimensional objects.
- Higher-sensitivity film or sensor, but may yield more grain and or digital noise.
- Slower shutter speed, which may require affixing the camera to be immobile during exposure. A hand-held camera may capture the movement of the camera/photographer while the shutter is open, causing the captured image to appear blurred. Generally, for 35mm film style cameras, this has been thought to be any exposure time longer in seconds than 1/focal-length-mm, such that a 50mm lens may capture photographer shake at hand-held exposures longer than 1/50th seconds, a 200mm lens may capture shake at exposure longer than 1/200 seconds, and so on. Modern active anti-shake systems, smaller image capture sizes than 35mm film (includes almost all digital cameras), and cameras with simpler internal moving systems than SLRs (rangefinders have no slapping mirror, and often have simple, light-weight, in-lens shutters rather than large, heavy, focal plane shutters, for instance) all are capable of beating this antiquated threshold by as much as 4 times longer exposure times then the 1/focal-length-mm seconds "rule", however, steady handling techniques will always enhance capture accuracy.
Depending on the environment, you may need to employ one or all of the above tricks to capture a satisfactorily accurate exposure with minimum noise/grain. It is also possible to underexpose during capture and overdevelop later (film or digital - known as push processing), but be aware that this usually increases noise/grain.
Stability[edit]
The use of a tripod stabilizes the camera during longer exposure times and allows to make sharper images. If the museum allows the use of tripods or monopods it is recommended to use one, as long exposures times permit, or are required by, "slow" fine grained film or low digital ISO speed equivalents required for the least "noisy" or least "grainy" image capture, and / or the use of small lens apertures which increase the depth of field focus of the subject matter.
If you can't use a support, you can reduce camera movement considerably by:
- selecting a camera with an appropriately tested anti camera / photographer shake compensation system may improve the clarity of captured images while hand holding the camera in indoor "available" light.
- standing perpendicular to the direction you are aiming, with your feet at least shoulder-width apart.
- pulling your elbows in tight to your chest to form a cradle for the camera with both hands.
- remember "BRASS" -- Breathe, Relax, Aim, Squeeze the shutter release slowly, Shoot while holding your breath.
Specific cases[edit]
Bidimensional works and diaphragm aperture[edit]
Bidimensional works of art, such as paintings, do not require a large depth of field. It is possible to open the diaphragm to around f/4 and gain some light. The light thus gained allows to lower the sensitivity of the sensor, and hence digital noise.
Paintings often reflect light. One way to overcome the problem is to take photographs from an angle, and correct the perspective in post-processing (this also works when using flashes).
Tridimensional objects: fixing the camera body[edit]
For tridimensional objects, it is capital to have a sufficient depth of field, to avoid cases like a statue with the tip of its nose sharp and its body blurred. This kind of case is especially problematic in proxiphotography. Even by raising the sensitivity of the sensor (and thus the noise level), little can be done to compensate the problem apart from fixing the camera.
- Fixing the camera body
In the absence of a tripod the camera body can be fixed upon many items in the museum: doorframes, tablets, stands or fences. The small fence masts which hold ropes in front of works make excellent stands for cameras. It is possible to orient the camera both in elevation and azimuth (vertical and horizontal angles).
Most of the shaking of hand-held photography disappears when one of the three dimensions of space is constrained. Hence, a tripod is better than a monopod, but a monopod is much better than just holding the camera.
-
 Example of insufficient depth of field
 -
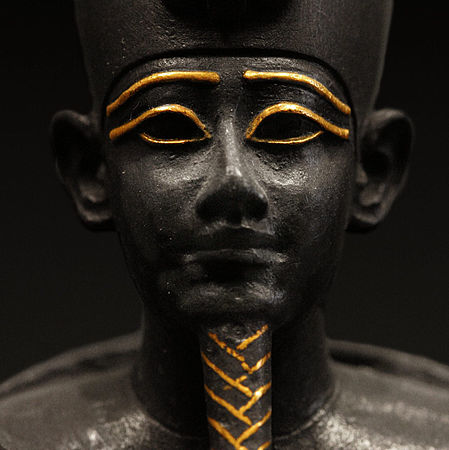 Detail of a 17cm high statuette, taken with a 100mm macro lens leaning on a display window


- Display glass
It is possible to press the end of the lens directly against displays. This will both cut out most reflections in the glass, and provide a stand for the camera. On the other hand, the distance to the subject is then fixed: the focal length and the minimum focusing distance must be adapted:
- a macro lens might be in order to achieve focus on close objects (either small ones, or details of bigger ones)
- a wide angle lens would be needed to capture the entirety of a bigger object. In the case, beware the deformations induced by very wide angle lenses.
Beware of lenses which change their length when focusing or zooming. Ideally, you should be able to zoom or focus after setting the camera in place. It might be advisable to use a lens hood so that the end which touches the display does not move with respect to the camera body.
Another way to reduce reflections is to use a polariser. This will cost you one and half stops of light, so using a tripod may be necessary.
In the case of horizontal display glasses, the camera can be put directly on the glass, which then serves as a support. Motion blur is further avoided by setting the camera on Timer. Reflections are minimised by the camera leaning directly against the glass, and further reflections can be canceled by placing one's body or hands as to eliminate undesired incomming light. Depending on the camera type, a variety of angles can be obtained; other objects, such as lens hoods or pencils, can be used to tune the angle and distance of the camera with respect to the glass.
-
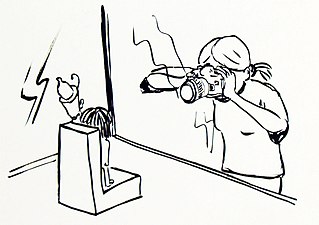
 take the picture on a fence masts to gain stability
 -
 take the picture against display windows
 -
 parallel to the display window
 -
 try different angles
 -
 try different angles


Documentation[edit]
It is important that every photograph be appropriately labeled. A proper label should include
- the name of the work and a short description;
- the name of its author, if known;
- the date and location of its making;
- its dimensions and the material out of which it is made, and
- a museum reference number, an access line or the location of the display within the museum.
This information is often on display on labels next to the work itself. Photographs of these labels should be taken to allow further labelling on Commons.
| This article or an earlier version of it has been (partially) translated from the English Wikiversity, which is licensed under the license Creative Commons Attribution-ShareAlike. See the editing history there. |