Category:Panoramas
Zur Navigation springen
Zur Suche springen
Bild, das einen großen Betrachtungswinkel abdeckt | |||||
| Medium hochladen | |||||
| Ist ein(e) | |||||
|---|---|---|---|---|---|
| Unterklasse von | |||||
| Verschieden von | |||||
| |||||

Unterkategorien
Es werden 17 von insgesamt 17 Unterkategorien in dieser Kategorie angezeigt:
In Klammern die Anzahl der enthaltenen Kategorien (K), Seiten (S), Dateien (D)
1
2
- 270° panoramas (2 D)
3
9
- 90° panoramas (2 D)
B
F
P
- Panorama icons (29 D)
- Partial spherical panoramics (1 D)
S
- Source images for stitched panoramic photographs (2 S, 1790 D)
W
Seiten in der Kategorie „Panoramas“
Folgende 2 Seiten sind in dieser Kategorie, von 2 insgesamt.
Medien in der Kategorie „Panoramas“
Folgende 200 Dateien sind in dieser Kategorie, von 921 insgesamt.
(vorherige Seite) (nächste Seite)-
 001 Post-Landing Window Pan.webp 1.664 × 706; 78 KB
-
 002 Post-Landing Window Pan - CDR.webp 7.264 × 3.183; 1,18 MB
-
 003 Post-Landing Window Pan - LMP.webp 4.907 × 5.512; 935 KB
-
 004 LM 4 O'clock Pan.webp 2.728 × 358; 169 KB
-
 005 LM 4 O'clock Pan - HR.jpg 17.704 × 3.590; 10,24 MB
-
 006 LM 4 O'clock Pan - North.jpg 13.181 × 3.862; 6,96 MB
-
 007 LM 4 O'clock Pan - South.jpg 11.262 × 3.453; 6,24 MB
-
 008 ALSEP Pan.webp 4.554 × 468; 265 KB
-
 009 ALSEP Pan HR.jpg 18.157 × 2.222; 7,16 MB
-
 011 ALSEP Pan North.jpg 9.713 × 3.378; 5,56 MB
-
 012 ALSEP Pan South.jpg 11.136 × 4.010; 5,87 MB
-
 013 Charlie's Station 1 Pan.jpg 3.621 × 568; 216 KB
-
 014-PSR-Map.webp 372 × 405; 14 KB
-
 015-USGS-Map.webp 1.494 × 1.105; 109 KB
-
 016 Charlie's Station 1 Pan HR.jpg 17.660 × 3.513; 8,39 MB
-
 017 Charlie's Station 1 Pan North - crop.jpg 3.349 × 874; 527 KB
-
 018 Charlie's Station 1 Pan South - Crop.jpg 3.556 × 1.039; 695 KB
-
 019 Charlie's Station 1 Pan Alt 1.webp 3.300 × 2.100; 599 KB
-
 020 Charlie's Station 1 Pan Alt 2.webp 2.514 × 758; 261 KB
-
 021 Charlie's Station 1 Pan Alt 3.jpg 3.000 × 1.130; 605 KB
-
 023 John's Station 1 Pan HR.jpg 17.748 × 4.911; 11,76 MB
-
 023 John's Station 1 Pan.webp 3.758 × 618; 246 KB
-
 024 John's Station 1 Pan North.jpg 10.501 × 5.177; 6,87 MB
-
 025 John's Station 1 Pan South.jpg 9.564 × 4.105; 5,63 MB
-
 027 John's Station 1 Pan - Two Charlie.webp 2.758 × 387; 128 KB
-
 028 First Station 2 Pan.webp 3.987 × 459; 192 KB
-
 029 First Station 2 Pan - LMP Cuff Note.gif 540 × 547; 78 KB
-
 030 First Station Pan 2 HR.jpg 17.924 × 4.145; 9,34 MB
-
 031 First Station Pan 2 North - Crop.jpg 3.415 × 883; 591 KB
-
 031 First Station Pan 2 North.jpg 10.655 × 7.410; 6,88 MB
-
 032 First Station Pan 2 South - Crop.jpg 3.462 × 861; 586 KB
-
 032 First Station Pan 2 South.jpg 10.257 × 5.760; 5,57 MB
-
 033 First Station 2 Pan Alt 1.webp 2.000 × 400; 109 KB
-
 034 First Station 2 Pan Alt 2.webp 3.514 × 1.759; 703 KB
-
 035 First Station 2 Pan Alt 3.jpg 3.300 × 2.100; 1,54 MB
-
 036 Buster Crater Partial Pan.webp 3.300 × 2.100; 571 KB
-
 037 Buster Crater Partial Pan HR - Crop.jpg 3.592 × 1.354; 1,09 MB
-
 038 500-mm Stone Mountain from Station 2.webp 4.289 × 743; 307 KB
-
 039 500-mm South Ray from Station 2.webp 1.082 × 431; 21 KB
-
 040 UV Camera, End of EVA-1.webp 907 × 330; 40 KB
-
 041 UV Camera, End of EVA-1 - Alt 1.webp 962 × 458; 71 KB
-
 042 UV Camera, End of EVA-1 - Alt 2.webp 5.051 × 4.081; 1.016 KB
-
 043 4 O'Clock LM Pan, Start of EVA-2.webp 3.749 × 449; 165 KB
-
 044 4 O'Clock LM Pan, Start of EVA-2 Alt 1.gif 1.325 × 310; 271 KB
-
 045 4 O'Clock LM Pan, Start of EVA-2 North Crop.jpg 3.763 × 850; 527 KB
-
 046 4 O'Clock LM Pan, Start of EVA-2 South Crop.jpg 3.499 × 985; 571 KB
-
 047 South Ray Crater and Baby Ray Crater from Station 4.jpg 2.468 × 637; 280 KB
-
 048 Central Portion of South Ray Crater from Station 4.webp 3.272 × 2.082; 474 KB
-
 049 Central Portion of South Ray Crater from Station 4 Alt 1.webp 2.974 × 1.049; 241 KB
-
 050 Baby Ray Crater from Station 4.webp 614 × 401; 15 KB
-
 051 Stubby Crater from Station 4.webp 1.453 × 562; 30 KB
-

-

-
 054 John's Station 4 Pan.webp 4.047 × 862; 248 KB
-
 055 John's Station 4 Pan Alt 1 Crop.jpg 3.775 × 820; 560 KB
-
 055 John's Station 4 Pan Alt 1.jpg 17.319 × 7.188; 17,98 MB
-
 056 Station 4 Crater Detail, High Resolution.webp 3.300 × 2.100; 748 KB
-
 057 John's Station 4 Pan, Northern Portion.jpg 850 × 378; 67 KB
-
 058 Charlie's Station 4 Pan.webp 3.964 × 691; 157 KB
-
 059 Station 4 Rover.webp 1.017 × 505; 110 KB
-
 060 Station 4 Rover Tracks.webp 1.638 × 460; 89 KB
-
 061 Station 5 Pan.webp 3.986 × 524; 145 KB
-
 062 Charlie's Station 6 Pan.webp 3.921 × 542; 211 KB
-
 063 Charlie's Station 6 Pan - John at the Rover.jpg 6.698 × 1.615; 1,22 MB
-
 064 Charlie's Station 8 pan.webp 3.933 × 555; 168 KB
-
 065 Charlie's Station 8 pan - Antenna.webp 5.717 × 2.568; 1,27 MB
-
 066 Charlie's Station 9 pan.webp 4.076 × 552; 190 KB
-
 067 Station 9 LRV Tracks.webp 950 × 337; 31 KB
-
 068 John's ALSEP Pan.jpg 4.222 × 597; 702 KB
-
 069 John's ALSEP pan Rover.webp 2.000 × 400; 130 KB
-
 070 Start of EVA-3, 500mm Stone Mountain Portrait.webp 5.432 × 743; 235 KB
-
 071 Charlie's Plus-Z Pan at the Start of EVA-3.webp 3.681 × 397; 255 KB
-
 072 Charlie's Plus-Z Pan at the Start of EVA-3 HR.jpg 2.226 × 928; 645 KB
-
 074 North Ray Crater Interior, 500-mm Pan.webp 8.040 × 1.344; 796 KB
-
 075 John's Station 11 Pan.webp 3.898 × 725; 263 KB
-
 076 John's Station 11 Pan - Rover.webp 2.188 × 404; 105 KB
-
 077 John's Station 11 Pan - Rover 2.webp 1.063 × 295; 54 KB
-
 078 John's Station 11 Pan - LPI.jpg 19.223 × 2.024; 12,78 MB
-
 079 North Ray Crater, 1st Polarization Pan.webp 6.125 × 2.436; 1,54 MB
-
 080 North Ray Crater, 1st Polarization Pan - Alt 1.webp 1.099 × 405; 47 KB
-
 081 North Ray Crater, 1st Polarization Pan - Alt 2.webp 1.063 × 361; 63 KB
-
 082 North Ray, 2nd Polarization Pan.webp 7.585 × 2.701; 2,13 MB
-
 083 North Ray, 2nd Polarization Pan - Alt 1.webp 1.443 × 456; 68 KB
-
 084 North Ray, 3rd Polarization Pan.webp 7.708 × 2.597; 2,24 MB
-
 085 North Ray, 3rd Polarization Pan - Alt 1.jpg 1.466 × 417; 93 KB
-
 086 North Ray, 4th Polarization Pan.webp 7.820 × 2.541; 2,05 MB
-
 088 North Ray, 5th Polarization Pan.webp 7.740 × 2.745; 1,55 MB
-
 089 North Ray, 5th Polarization Pan - Alt 1.webp 1.449 × 422; 41 KB
-
 090 North Ray, 6th Polarization Pan.jpg 7.683 × 2.704; 4,24 MB
-
 091 North Ray, 6th Polarization Pan - Alt 1.webp 1.459 × 467; 39 KB
-
 092 Base of House Rock.webp 822 × 240; 53 KB
-
 093 Base of House Rock 2.webp 7.000 × 3.354; 2,06 MB
-
 094 Station 13 Pan.webp 3.993 × 742; 81 KB
-
 095 John and the Rover at Shadow Rock.webp 5.085 × 2.370; 1,57 MB
-
 097 LRV at Station 13.webp 1.125 × 338; 30 KB
-
 098 Portrait of Shadow Rock.webp 838 × 397; 37 KB
-
 099 Station 10-Prime Pan.webp 3.768 × 384; 129 KB
-
 1. Entrada xmp e.jpg 5.376 × 2.688; 1,5 MB
-
 11988478256 Jpg (175372501).jpeg 2.048 × 892; 328 KB
-
 12 O'Clock LM Pan at the end of EVA-2.webp 3.989 × 656; 271 KB
-
 1886 Friedrich Goebel Panoramafotografie "Von Witten und Umgebung".jpg 1.920 × 920; 718 KB
-
 2007050602 Einbau Poller Jacobäerstrasse Panorama.jpg 3.762 × 1.725; 3,75 MB
-
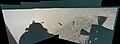
 2012 Chicago Auto Show Panoramic (6879463587).jpg 14.232 × 2.582; 15,37 MB
-
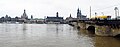 2013060406 Hochwasserpanorama 2013.jpg 4.474 × 1.744; 4,26 MB
-
 20150403 134753 Pano.jpg 6.080 × 1.216; 3,49 MB
-
 4 O'Clock LM Pan at the end of EVA-2.webp 3.829 × 556; 241 KB
-

-
 500px photo (160295969).jpeg 2.048 × 464; 364 KB
-
 8 O'Clock LM Pan at the end of EVA-2.webp 3.923 × 473; 234 KB
-
 A11 5847-8 dmh.webp 1.467 × 921; 235 KB
-
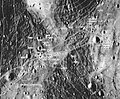 A14-usgs-B3-Cp.jpg 1.031 × 847; 296 KB
-
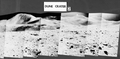
 A14B3North.jpg 2.589 × 496; 215 KB
-
 A15 S71-47077.webp 3.262 × 1.739; 666 KB
-
 A15 S71-47080.webp 4.418 × 2.177; 1,76 MB
-
 Aerial view of Port Steingard, Fitjar, Norway julesvernex2-3.jpg 8.356 × 4.412; 9,56 MB
-
 Aizawl panoramicview.jpg 1.648 × 688; 383 KB
-
 Amanecer lla....jpg 843 × 1.517; 146 KB
-
 Apollo 11 Panorama Station 2.jpg 8.123 × 646; 3,46 MB
-
 Apollo 11 Post-EVA 1.jpg 16.382 × 7.332; 9,43 MB
-
 Apollo 11 Post-EVA 4.jpg 15.394 × 5.650; 36,33 MB
-
 Apollo 11 Post-EVA 5.jpg 17.641 × 6.689; 41,54 MB
-
 Apollo 11 Post-EVA 6.jpg 9.961 × 4.900; 26,48 MB
-
 Apollo 11 Post-EVA 7.jpg 13.209 × 6.392; 34,11 MB
-
 Apollo 11 Post-EVA 8.webp 5.212 × 6.258; 1,18 MB
-
 Apollo 11 Post-EVA 9.jpg 13.602 × 9.790; 8,36 MB
-
 Apollo 12 - Al photographing the plus-Y footpad.webp 1.884 × 774; 292 KB
-
 Apollo 12 - Al's 'Little Lines' Mini Pan - Alternate.jpg 5.970 × 2.800; 8,86 MB
-
 Apollo 12 - Al's 12 O'Clock LM Pan - Alternate.jpg 3.829 × 502; 296 KB
-
 Apollo 12 - Al's 12 O'Clock LM Pan.webp 4.024 × 465; 172 KB
-
 Apollo 12 - Al's 4 O'clock LM Pan - High Resolution Assembly.jpg 13.149 × 1.811; 5,16 MB
-
 Apollo 12 - Al's 4 O'clock LM Pan - JSC Alternative.jpg 16.335 × 1.946; 13,36 MB
-
 Apollo 12 - Al's 4 O'clock LM Pan - Wider.webp 1.800 × 437; 127 KB
-
 Apollo 12 - Al's 4 O'clock LM Pan.webp 2.791 × 407; 121 KB
-
 Apollo 12 - Al's 6 O'clock LM pan.jpg 3.835 × 648; 395 KB
-
 Apollo 12 - Al's 6 O'Clock LM Pan.webp 3.992 × 468; 172 KB
-
 Apollo 12 - Al's First Block Crater Partial Pan.webp 1.027 × 607; 52 KB
-
 Apollo 12 - Al's Halo Crater Pan.jpg 4.214 × 500; 212 KB
-
 Apollo 12 - Al's Partial Pan of Surveyor Crater.jpg 538 × 415; 27 KB
-
 Apollo 12 - Al's Partial Pan of Surveyor Crater.webp 912 × 484; 49 KB
-
 Apollo 12 - Al's Second Block Crater Partial Pan - Hi Res.webp 3.300 × 2.100; 760 KB
-
 Apollo 12 - Al's Second Block Crater Partial Pan.jpg 1.137 × 489; 66 KB
-
 Apollo 12 - Al's Triple Craters Pan - Alternate.jpg 7.258 × 4.772; 7,12 MB
-
 Apollo 12 - Al's Triple Craters Pan.webp 937 × 423; 35 KB
-
 Apollo 12 - Mini-pan - Pete at the MESA - Colour alternative - Wider.jpg 16.762 × 4.879; 35,2 MB
-
 Apollo 12 - Mini-pan - Pete at the MESA - Colour alternative.jpg 10.114 × 4.348; 21,44 MB
-
 Apollo 12 - Mini-pan - Pete at the MESA.webp 969 × 389; 64 KB
-
 Apollo 12 - Pete's 12 O'clock LM Pan.webp 7.727 × 1.049; 594 KB
-
 Apollo 12 - Pete's 4 O'clock Pan.webp 8.011 × 1.077; 920 KB
-
 Apollo 12 - Pete's 8 O'clock Pan - LPI Variant.jpg 5.000 × 1.638; 858 KB
-
 Apollo 12 - Pete's 8 O'clock Pan.webp 7.751 × 1.086; 737 KB
-
 Apollo 12 - Pete's ALSEP Site Pan - Alternate.webp 7.469 × 1.032; 784 KB
-
 Apollo 12 - Pete's ALSEP Site Pan.webp 7.559 × 1.035; 790 KB
-
 Apollo 12 - Pete's First Sharp Crater Partial Pan - Alternative.jpg 11.961 × 4.331; 14,03 MB
-
 Apollo 12 - Pete's First Sharp Crater Partial Pan.webp 1.332 × 402; 56 KB
-
 Apollo 12 - Pete's Head Crater Pan.webp 4.169 × 452; 160 KB
-
 Apollo 12 - Pete's Left-to-Right Bench Crater Partial Pan.webp 6.831 × 3.860; 1,56 MB
-
 Apollo 12 - Pete's Right-to-Left Bench Crater Partial Pan.webp 5.869 × 4.307; 1,13 MB
-
 Apollo 12 - Pete's Second Pan at Middle Crescent Crater.webp 3.220 × 967; 279 KB
-
 Apollo 12 - Pete's Sharp Traverse Pan.webp 4.141 × 438; 130 KB
-
 Apollo 12 - Portrait of Head Crater.webp 939 × 420; 85 KB
-
 Apollo 12 - Post-EVA-1 Color Pan.webp 3.340 × 1.496; 379 KB
-
 Apollo 12 - Sharp Crater Pan 2 - Alternative.jpg 11.632 × 7.325; 15,36 MB
-
 Apollo 12 - Sharp Crater Pan 2.webp 1.322 × 436; 38 KB
-
 Apollo 12 - Surveyor Scoop Arm.webp 1.134 × 449; 74 KB
-
 Apollo 12 Post-EVA-1 CDR Window.jpg 15.446 × 10.017; 41,97 MB
-
 Apollo 12 Post-EVA-1 LMP Window.jpg 10.574 × 5.726; 30,02 MB
-
 Apollo 12 Post-EVA-2 CDR Window.jpg 13.377 × 8.347; 21,22 MB
-
 Apollo 12 Post-EVA-2 LMP Window.jpg 11.245 × 10.473; 20,97 MB
-
 Apollo 12 Post-EVA-2 Window Pan.webp 1.799 × 754; 98 KB
-
 Apollo 12 Pre-EVA-1 Window Pan - CDR window.jpg 3.945 × 4.464; 5,48 MB
-
 Apollo 12, Pete's First Pan at Middle Crescent Crater - HR B&W.webp 8.060 × 2.460; 1,04 MB
-
 Apollo 14 - First Panorama taken - Alternate variant.jpg 13.697 × 6.733; 22,1 MB
-
 Apollo 14 - LM 12 O'clock Pan Hi-Res LM.jpg 1.973 × 1.138; 904 KB
-
 Apollo 14 - LM 12 O'clock Pan Hi-Res West.jpg 12.508 × 3.310; 7,59 MB
-
 Apollo 14 - LM 12 O'clock Pan Hi-Res.jpg 12.893 × 3.185; 8,46 MB
-
 Apollo 14 - LM 12 O'clock Pan.jpg 4.012 × 492; 282 KB
-
 Apollo 14 - LM 4 O'clock Pan - LM - Alternate.jpg 15.130 × 9.940; 35,3 MB
-
 Apollo 14 - LM 4 O'clock Pan - LM.jpg 1.173 × 573; 143 KB
-
 Apollo 14 - LM 4 O'clock Pan - Portrait.jpg 3.329 × 2.193; 1,15 MB
-
 Apollo 14 - LM 4 O'clock Pan 3rd.jpg 4.109 × 442; 352 KB
-
 Apollo 14 - LM 4 O'clock Pan Artistic.jpg 2.463 × 400; 156 KB
-
 Apollo 14 - LM 4 O'clock Pan Hi Res.jpg 17.319 × 2.931; 10,38 MB
-
 Apollo 14 - LM 4 O'clock Pan.jpg 3.665 × 382; 847 KB
-
 Apollo 14 - LM 8 O'clock Pan.jpg 4.071 × 437; 310 KB
-
 Apollo 14 - Post-EVA-1 CDR Window Pan.jpg 10.171 × 6.143; 25,71 MB
-
 Apollo 14 - Post-EVA-1 LMP Window Pan.jpg 10.171 × 6.143; 22,53 MB
-
 Apollo 14 - Post-EVA-1 Window Pan.jpg 1.801 × 666; 149 KB
-
 Apollo 14 - Post-landing CDR Window Pan - Alternate.jpg 14.694 × 7.760; 23,29 MB
-
 Apollo 14 - Post-landing CDR Window Pan.jpg 927 × 434; 183 KB
-
 Apollo 14 - Post-landing Combined Window Pans.jpg 1.599 × 433; 302 KB
-
 Apollo 14 - Post-landing LMP Window Pan.jpg 1.323 × 1.241; 222 KB
-
 Apollo 14 - Station A Pan Mini-pan Hi-Res.jpg 7.365 × 2.440; 5,4 MB
-
 Apollo 14 - Station A Pan Mini-pan.jpg 2.953 × 2.314; 1,94 MB
-
 Apollo 14 - Station A Pan.jpg 3.955 × 485; 246 KB
-
 Apollo 14 - Station B Pan.jpg 4.293 × 448; 276 KB
-
 Apollo 14 - Station B1 - Ed Mitchell.jpg 6.856 × 3.752; 5,68 MB
-
 Apollo 14 - Station B1 Pan - Dave Byrne.jpg 4.161 × 486; 269 KB
-
 Apollo 14 - Station B1 Pan - Mini-pan.jpg 1.613 × 1.200; 796 KB
-
 Apollo 14 - Station B1 Pan.jpg 3.313 × 421; 332 KB
-
 Apollo 14 - Station B2 Northern View.jpg 2.712 × 531; 228 KB


.jpeg)


.jpg)
_taken_by_Buzz_Aldrin_just_after_the_landing_of_Apollo_11_on_the_Moon._This_is_a_contingency_shot_in_case_of_a_NO-STAY_call.webp)
.jpeg)