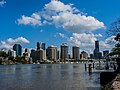
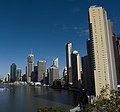
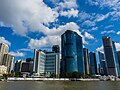
Category:Views of Brisbane CBD
Jump to navigation
Jump to search
Media in category "Views of Brisbane CBD"
The following 200 files are in this category, out of 258 total.
(previous page) (next page)-
 Altocumulus undulatus and cumulus mediocris Victoria Bridge Brisbane P1100592.jpg 4,000 × 3,000; 9.57 MB
-
 Altocumulus undulatus and cumulus mediocris Victoria Bridge Brisbane P1100593.jpg 4,000 × 3,000; 9.39 MB
-
 Altocumulus undulatus and cumulus mediocris Victoria Bridge Brisbane P1100594.jpg 3,000 × 4,000; 9.2 MB
-
 Altocumulus undulatus and cumulus mediocris Victoria Bridge Brisbane P1100595.jpg 4,000 × 3,000; 9.39 MB
-
 Altocumulus undulatus and cumulus mediocris Victoria Bridge Brisbane P1100596.jpg 4,000 × 3,000; 9.14 MB
-
 Altocumulus undulatus and cumulus mediocris Victoria Bridge Brisbane P1100597.jpg 3,000 × 4,000; 9.11 MB
-
 Altocumulus undulatus and cumulus mediocris Victoria Bridge Brisbane P1100598.jpg 4,000 × 3,000; 8.92 MB
-
 Altocumulus undulatus and cumulus mediocris Victoria Bridge Brisbane P1100599.jpg 3,000 × 4,000; 9.24 MB
-
 Altocumulus undulatus and cumulus mediocris Victoria Bridge Brisbane P1100600.jpg 3,000 × 4,000; 9.13 MB
-
 Altocumulus undulatus and cumulus mediocris Victoria Bridge Brisbane P1100601.jpg 4,000 × 3,000; 9.34 MB
-
 Altocumulus undulatus and cumulus mediocris Victoria Bridge Brisbane P1100602.jpg 4,000 × 3,000; 9.14 MB
-
 Altocumulus undulatus and cumulus mediocris Victoria Bridge Brisbane P1100603.jpg 4,000 × 3,000; 9.96 MB
-
 Altocumulus undulatus and cumulus mediocris Victoria Bridge Brisbane P1100604.jpg 4,000 × 3,000; 10.48 MB
-
 Altostratus and cirrus Victoria Bridge Brisbane P1120260.jpg 4,000 × 3,000; 12.27 MB
-
 Altostratus Victoria Bridge Brisbane P1120259.jpg 4,000 × 3,000; 11.95 MB
-
 Anzac Square building Brisbane 1984 - Photographed by Robert McPherson 06-08-2015 16.tif 5,184 × 3,456; 51.26 MB
-
 Barret St Reserve looking toward the City - Bracken Ridge panorama.jpg 7,860 × 1,975; 755 KB
-
 Barret St Reserve looking toward the City, Bracken Ridge IMGP0102.jpg 3,008 × 2,000; 2.13 MB
-
 Barret St Reserve looking toward the City, Bracken Ridge IMGP0103.jpg 3,008 × 2,000; 2.19 MB
-
 Barret St Reserve looking toward the City, Bracken Ridge IMGP0104.jpg 3,008 × 2,000; 2.15 MB
-
 Barret St Reserve looking toward the City, Bracken Ridge IMGP0105.jpg 3,008 × 2,000; 2.12 MB
-
 Barret St Reserve looking toward the City, Bracken Ridge IMGP0106.jpg 3,008 × 2,000; 2.04 MB
-
 Bowen Hills Fortitude Valley and Brisbane City from Bartley's Hill Hamilton IMGP4634.jpg 4,288 × 2,848; 8.6 MB
-
 Bowen Hills Fortitude Valley and Brisbane City from Bartley's Hill Hamilton IMGP4635.jpg 4,288 × 2,848; 8.22 MB
-
 Bowen Hills Fortitude Valley and Brisbane City from Bartley's Hill Hamilton IMGP4646.jpg 4,288 × 2,848; 7.92 MB
-
 Brisbane CBD and Story Bridge from the Humbug Reach Brisbane River P1150386.jpg 4,000 × 3,000; 7.63 MB
-
 Brisbane CBD and Story Bridge from the Humbug Reach Brisbane River P1150387.jpg 4,000 × 3,000; 7.24 MB
-
 Brisbane CBD and Victoria Bridge from Riverwalk South Brisbane P1190497.jpg 4,000 × 3,000; 10.25 MB
-
 Brisbane CBD and Victoria Bridge from Riverwalk South Brisbane P1190498.jpg 4,000 × 3,000; 10.53 MB
-
 Brisbane CBD and Victoria Bridge from Riverwalk South Brisbane P1190499.jpg 4,000 × 3,000; 10.96 MB
-
 Brisbane CBD and Victoria Bridge from Riverwalk South Brisbane P1190501.jpg 3,000 × 4,000; 11.46 MB
-
 Brisbane CBD and Victoria Bridge from Southbank Parklands South Brisbane P1290502.jpg 4,000 × 3,000; 7.33 MB
-
 Brisbane CBD and Victoria Bridge from Southbank Parklands South Brisbane P1290503.jpg 4,000 × 3,000; 8.24 MB
-
 Brisbane CBD at sunrise from Southbank Parklands South Brisbane P1250995.jpg 4,000 × 3,000; 11.48 MB
-
 Brisbane CBD at sunrise from Southbank Parklands South Brisbane P1250996.jpg 4,000 × 3,000; 11.32 MB
-
 Brisbane CBD at sunrise from Southbank Parklands South Brisbane P1250997.jpg 4,000 × 3,000; 10 MB
-
 Brisbane CBD at sunrise from Southbank Parklands South Brisbane P1250998.jpg 4,000 × 3,000; 10.14 MB
-
 Brisbane CBD at sunrise from Southbank Parklands South Brisbane P1260001.jpg 4,000 × 3,000; 10.29 MB
-
 Brisbane CBD buildings from CityCat Walan Petrie Bight Brisbane River P1230645.jpg 4,000 × 3,000; 10.89 MB
-
 Brisbane CBD buildings from CityCat Walan Town Reach Brisbane River P1230622.jpg 4,000 × 3,000; 11.19 MB
-
 Brisbane CBD buildings from CityCat Walan Town Reach Brisbane River P1230623.jpg 4,000 × 3,000; 12.02 MB
-
 Brisbane CBD buildings from CityCat Walan Town Reach Brisbane River P1230624.jpg 4,000 × 3,000; 11.59 MB
-
 Brisbane CBD buildings from CityCat Walan Town Reach Brisbane River P1230630.jpg 3,000 × 4,000; 11.45 MB
-
 Brisbane CBD buildings from Elizabeth St Brisbane P1180180 01.jpg 4,000 × 3,000; 9.09 MB
-
 Brisbane CBD buildings from Elizabeth St Brisbane P1180180 02.jpg 3,000 × 4,000; 7.57 MB
-
 Brisbane CBD from Alice St Brisbane P1340851.jpg 4,000 × 3,000; 9.08 MB
-
 Brisbane CBD from Alice St Brisbane P1340852.jpg 4,000 × 3,000; 9.35 MB
-
 Brisbane CBD from Alice St Brisbane P1340853.jpg 4,000 × 3,000; 10.44 MB
-
 Brisbane CBD from CityCat Beenung-urrung South Brisbane Reach Brisbane River P1240083.jpg 4,000 × 3,000; 6.66 MB
-
 Brisbane CBD from CityCat Beenung-urrung South Brisbane Reach Brisbane River P1240084.jpg 4,000 × 3,000; 6.65 MB
-
 Brisbane CBD from CityCat Mooroolbin Town Reach Brisbane River Brisbane P1380601.jpg 4,000 × 3,000; 10.93 MB
-
 Brisbane CBD from CityCat Mooroolbin Town Reach Brisbane River Brisbane P1380602.jpg 3,000 × 4,000; 10.72 MB
-
 Brisbane CBD from CityCat Mooroolbin Town Reach Brisbane River Brisbane P1380603.jpg 3,000 × 4,000; 10.14 MB
-
 Brisbane CBD from CityCat Mooroolbin Town Reach Brisbane River Brisbane P1380605.jpg 3,000 × 4,000; 10.97 MB
-
 Brisbane CBD from CityCat Mooroolbin Town Reach Brisbane River Brisbane P1380606.jpg 3,000 × 4,000; 12.07 MB
-
 Brisbane CBD from CityFerry Otter Town Reach Brisbane River IMGP9116.jpg 4,288 × 2,848; 10.09 MB
-
 Brisbane CBD from CityFerry Otter Town Reach Brisbane River IMGP9122.jpg 2,848 × 4,288; 12.65 MB
-
 Brisbane CBD from CityFerry Otter Town Reach Brisbane River IMGP9128.jpg 2,848 × 4,288; 11.61 MB
-
 Brisbane CBD from Enoggera Tce Paddington P1430149.jpg 3,000 × 4,000; 7.57 MB
-
 Brisbane CBD from Enoggera Tce Paddington P1430150.jpg 3,000 × 4,000; 7.27 MB
-
 Brisbane CBD from Enoggera Tce Paddington P1430151.jpg 3,000 × 4,000; 8.41 MB
-
 Brisbane CBD from Fokker 70 Brisbane Queensland P1040143.jpg 4,000 × 3,000; 7.26 MB
-
 Brisbane CBD from Fokker 70 Brisbane Queensland P1040144.jpg 4,000 × 3,000; 7.9 MB
-
 Brisbane CBD from Fokker 70 Brisbane Queensland P1040145.jpg 4,000 × 3,000; 8.09 MB
-
 Brisbane CBD from Gateway Bridge Eagle Farm IMGP3427.jpg 4,288 × 2,848; 11.05 MB
-
 Brisbane CBD from Logan Rd Greenslopes P1030853.jpg 4,000 × 3,000; 2.79 MB
-
 Brisbane CBD from May St 100 0974.jpg 1,368 × 2,080; 570 KB
-
 Brisbane CBD from Mount Gravatt Lookout Shire Rd Mount Gravatt P1260934.jpg 4,000 × 3,000; 8.91 MB
-
 Brisbane CBD from Mount Gravatt Lookout Shire Rd Mount Gravatt P1260935.jpg 4,000 × 3,000; 9 MB
-
 Brisbane CBD from Palmer St Windsor P1370751.jpg 4,000 × 3,000; 7.88 MB
-
 Brisbane CBD from Palmer St Windsor P1370752.jpg 4,000 × 3,000; 8.61 MB
-
 Brisbane CBD from Petrie Bight Brisbane River P1260543.jpg 4,000 × 3,000; 12.12 MB
-
 Brisbane CBD from Pfingst Rd and Rode Rd Wavell Heights P1000216.jpg 4,000 × 3,000; 9.66 MB
-
 Brisbane CBD lights from Kurilpa Bridge Brisbane IMGP1853.jpg 4,288 × 2,848; 5.5 MB
-
 Brisbane CBD lights from Kuripla Bridge Brisbane P1200683.jpg 4,000 × 3,000; 6.36 MB
-
 Brisbane CBD lights from Kuripla Bridge Brisbane P1200684.jpg 4,000 × 3,000; 5.91 MB
-
 Brisbane CBD Skyline from George St 100 1065.jpg 2,080 × 1,368; 559 KB
-
 Brisbane CBD Skyline from George St 100 1066.jpg 1,368 × 2,080; 568 KB
-
 Brisbane CBD Skyline from George St 100 1067.jpg 1,368 × 2,080; 573 KB
-
 Brisbane CBD, Pfingst Rd Wavell Heights DSCF3623.jpg 3,264 × 2,448; 2.97 MB
-
 Brisbane CBD, Pfingst Rd Wavell Heights DSCF3625.jpg 3,264 × 2,448; 3.03 MB
-
 Brisbane CBD, Pfingst Rd Wavell Heights DSCF3627.jpg 3,264 × 2,448; 3.58 MB
-
 Brisbane CBD, Shaw Rd Wavell Heights DSCF3628.jpg 3,264 × 2,448; 3.43 MB
-
 Brisbane CBD, Shaw Rd Wavell Heights DSCF3629.jpg 3,264 × 2,448; 3.3 MB
-
 Brisbane city and high cloud, Rode Rd Wavell Heights DSCF3408.jpg 3,264 × 2,448; 3.1 MB
-
 Brisbane City and North Quay Ferry Terminal from Victoria Bridge Brisbane P1170982.jpg 4,000 × 3,000; 10.97 MB
-
-

-
 Brisbane City from Pfingst Rd Wavell Heights IMGP2552.jpg 2,008 × 3,008; 4.28 MB
-
 Brisbane City from Pfingst Rd Wavell Heights IMGP2553.jpg 2,008 × 3,008; 4.47 MB
-
 Brisbane City from Pfingst Rd Wavell Heights IMGP2554.jpg 2,008 × 3,008; 4.53 MB
-
 Brisbane City from Pfingst Rd Wavell Heights IMGP2555.jpg 2,008 × 3,008; 3.52 MB
-
 Brisbane City from the Gateway Bridge, Eagle Farm IMGP1298.jpg 3,008 × 2,000; 1.59 MB
-
 Brisbane City from the Gateway Bridge, Murrarie IMGP1294.jpg 3,008 × 2,000; 1.59 MB
-
 Brisbane City from the Gateway Bridge, Murrarie IMGP1295.jpg 3,008 × 2,000; 1.6 MB
-
 Brisbane City from the Gateway Bridge, Murrarie IMGP1296.jpg 3,008 × 2,000; 1.58 MB
-
 Brisbane City from Victoria Bridge Brisbane P1170983.jpg 4,000 × 3,000; 11.6 MB
-
 Brisbane City from Zetland St and Rode Rd Wavell Heights P1030208.jpg 4,000 × 3,000; 10.04 MB
-
 Brisbane City from Zetland St and Rode Rd Wavell Heights P1030209.jpg 4,000 × 3,000; 8.95 MB
-
 Brisbane City from Zetland St and Rode Rd Wavell Heights P1030211.jpg 4,000 × 3,000; 8.76 MB
-
 Brisbane City from Zetland St and Rode Rd Wavell Heights P1030212.jpg 4,000 × 3,000; 8.96 MB
-
 Brisbane from Bartley's Hill Hamilton IMGP4633.jpg 4,288 × 2,848; 8.87 MB
-
 Brisbane from Mt Gravatt Lookout Shire Rd Mt Gravatt P1410697.jpg 4,000 × 3,000; 8.05 MB
-
 Brisbane River and skyline from South Bank Brisbane IMGP6207.jpg 3,008 × 2,000; 2.51 MB
-
 Brisbane River and skyline from South Bank Brisbane IMGP6208.jpg 3,008 × 2,000; 2.41 MB
-
 Brisbane River Town Reach from Storey Bridge P1030015 1.jpg 2,910 × 1,961; 6.17 MB
-
 Brisbane River Town Reach from Storey Bridge P1030015 2.jpg 3,121 × 2,912; 9.58 MB
-
 Brisbane River Town Reach from Storey Bridge P1030015.jpg 3,122 × 2,912; 8.74 MB
-
 Brisbane Skyline from O'Connell Tce Bowen Hills IMGP9111.jpg 3,008 × 2,000; 1.88 MB
-
 Brisbane Skyline from O'Connell Tce Bowen Hills IMGP9112.jpg 3,008 × 2,000; 1.81 MB
-
 Brisbane Skyline from O'Connell Tce Bowen Hills IMGP9113.jpg 3,008 × 2,000; 1.78 MB
-
 Brisbane skyline from Southbank, South Brisbane DSCF6299.jpg 3,264 × 2,448; 3.2 MB
-
 Brisbane skyline from Story Bridge Fortitude Valley P1040617 01.jpg 4,000 × 3,000; 11.97 MB
-
 Brisbane skyline from Story Bridge Fortitude Valley P1040617 02.jpg 4,000 × 3,000; 11.77 MB
-
 Brisbane skyline from Story Bridge Fortitude Valley P1040617 03.jpg 4,000 × 3,000; 11.1 MB
-
 Brisbane skyline from Story Bridge Fortitude Valley P1040617 04.jpg 4,000 × 3,000; 10.92 MB
-
 Brisbane skyline from Story Bridge Fortitude Valley P1040617 05.jpg 4,000 × 3,000; 10.3 MB
-
 Brisbane skyline from Story Bridge Panorama 01.jpg 13,814 × 2,662; 5.52 MB
-
 Brisbane skyline from Valley Centre carpark roof, Fortitude Valley DSCF2287.jpg 3,264 × 2,448; 3.17 MB
-
 Brisbane skyline from Valley Centre carpark roof, Fortitude Valley DSCF2289.jpg 3,264 × 2,448; 2.95 MB
-
 Brisbane skyline from Valley Centre carpark roof, Fortitude Valley DSCF2290.jpg 3,264 × 2,448; 2.96 MB
-
 Brisbane skyline from Valley Centre carpark roof, Fortitude Valley DSCF2300.jpg 3,264 × 2,448; 2.98 MB
-
 Brisbane Skyline from William St and the Victoria Bridge DSCF6300.jpg 3,264 × 2,448; 3.14 MB
-
 Brisbane skyline, from Roma St Brisbane DSCF8369.jpg 3,264 × 2,448; 3.28 MB
-
 Brisbane skyline, from Roma St Brisbane DSCF8370.jpg 3,264 × 2,448; 2.94 MB
-
 Brisbane skyline, from Roma St Brisbane DSCF8371.jpg 3,264 × 2,448; 3.31 MB
-
 Brisbane skyline, from Roma St DSCF3917.jpg 3,264 × 2,448; 3.09 MB
-
 CBD and Green Square from Brooke St Bowen Hills DSCF5571.jpg 3,264 × 2,448; 3.35 MB
-
 CBD and Green Square from Brooke St Bowen Hills DSCF5572.jpg 3,264 × 2,448; 3.31 MB
-

-
 CBD from Brooke St Bowen Hills DSCF5573.jpg 3,264 × 2,448; 3.18 MB
-
 Centenery Place, Fortitude Valley 100 1497.jpg 2,080 × 1,368; 571 KB
-
 Centenery Place, Fortitude Valley 100 1498.jpg 2,080 × 1,368; 587 KB
-
 Centenery Place, Fortitude Valley 100 1499.jpg 2,080 × 1,368; 567 KB
-

-

-
 Cirrus and Brisbane CBD from CityCat Mianjin Petrie Bight Brisbane River P1230856.jpg 4,000 × 3,000; 9.4 MB
-
 Cirrus and Brisbane CBD from CityCat Mianjin Petrie Bight Brisbane River P1230857.jpg 4,000 × 3,000; 9.52 MB
-
 Cirrus and Brisbane CBD from CityCat Mianjin Petrie Bight Brisbane River P1230858.jpg 4,000 × 3,000; 9.75 MB
-
 Cirrus cumulus mediocris Kurilpa Bridge CBD and Delonix Regia South Brisbane P1200105.jpg 3,000 × 4,000; 9.07 MB
-
 Cirrus cumulus mediocris Kurilpa Bridge CBD and Delonix Regia South Brisbane P1200106.jpg 3,000 × 4,000; 9.29 MB
-
 Cirrus cumulus mediocris Kurilpa Bridge CBD and Delonix Regia South Brisbane P1200107.jpg 3,000 × 4,000; 9.83 MB
-
 Cirrus cumulus mediocris Kurilpa Bridge CBD and Delonix Regia South Brisbane P1200108.jpg 4,000 × 3,000; 9.06 MB
-
 Cirrus cumulus mediocris Kurilpa Bridge CBD and Delonix Regia South Brisbane P1200109.jpg 3,000 × 4,000; 8.84 MB
-

-
 City and clouds, Pfingst Rd Wavell Heights IMGP5237.jpg 1,536 × 1,024; 620 KB
-
 City and clouds, Pfingst Rd Wavell Heights IMGP5238.jpg 1,024 × 1,536; 558 KB
-

-

-
 City Buildings, Queen St and Creek St, Brisbane DSCF1553.jpg 2,448 × 3,264; 2.84 MB
-
 City view New Farm Park New Farm P1420317.jpg 4,000 × 3,000; 12.67 MB
-
 City view New Farm Park New Farm P1420318.jpg 4,000 × 3,000; 12.39 MB
-
 Cloud, Wickham Tce and Turbot St Spring Hill DSCF8221.jpg 2,448 × 3,264; 3.44 MB
-
 Cloud, Wickham Tce and Turbot St Spring Hill DSCF8222.jpg 2,448 × 3,264; 3.42 MB
-
 Cloud, Wickham Tce and Turbot St Spring Hill DSCF8223.jpg 2,448 × 3,264; 3.77 MB
-
 Construction site Margaret St Brisbane P1190976.jpg 4,000 × 3,000; 7.52 MB
-
 Cranes and city buildings from Roma St Brisbane DSCF0093.jpg 2,448 × 3,264; 3.02 MB
-
 Cranes and city buildings from Roma St Brisbane DSCF0096.jpg 2,448 × 3,264; 3.18 MB
-
 Cranes on Roma St Brisbane DSCF0091.jpg 3,264 × 2,448; 3.3 MB
-
 Cranes on Roma St Brisbane DSCF0092.jpg 3,264 × 2,448; 3.28 MB
-
 Cranes on the skyline, from Roma St Brisbane DSCF8310.jpg 3,264 × 2,448; 3.32 MB
-
 Cumulonimbus Altostratus and Cumulus mediocris Victoria Bridge Brisbane P1360257.jpg 4,000 × 3,000; 7.97 MB
-
 Cumulus calvus and Brisbane CBD Albert St Brisbane P1210834.jpg 4,000 × 3,000; 8.63 MB
-
 Cumulus calvus and Brisbane CBD Albert St Brisbane P1210835.jpg 3,000 × 4,000; 8.33 MB
-
 Cumulus calvus South Brisbane Reach Brisbane River P1230588.jpg 4,000 × 3,000; 8.04 MB
-
 Cumulus mediocris and Altostratus South Brisbane Reach Brisbane River P1200575.jpg 4,000 × 3,000; 7.78 MB
-
 Cumulus mediocris and Altostratus South Brisbane Reach Brisbane River P1200576.jpg 4,000 × 3,000; 8.11 MB
-
 Cumulus mediocris and Altostratus South Brisbane Reach Brisbane River P1200577.jpg 4,000 × 3,000; 8.58 MB
-
 Cumulus mediocris and Cirrostratus undulatus Victoria Bridge Brisbane P1420582.jpg 3,000 × 4,000; 8.81 MB
-
 Cumulus mediocris Construction site and CBD Old Cleveland Rd Coorparoo P1430766.jpg 4,000 × 3,000; 8.31 MB
-
 Cumulus mediocris Construction site and CBD Old Cleveland Rd Coorparoo P1430767.jpg 4,000 × 3,000; 7.84 MB
-
 Cumulus mediocris Kurilpa Bridge Brisbane P1350001.jpg 4,000 × 3,000; 7.71 MB
-
 Cumulus mediocris over the Kurilpa Bridge Brisbane P1120229.jpg 4,000 × 3,000; 12.22 MB
-
 Cumulus mediocris over the Victoria Bridge Brisbane P1120228.jpg 4,000 × 3,000; 12.72 MB
-
 Fortitude Valley and Brisbane City from Bartley's Hill Hamilton IMGP4644.jpg 4,288 × 2,848; 8.06 MB
-
 Fortitude Valley and Brisbane City from Bartley's Hill Hamilton IMGP4645.jpg 4,288 × 2,848; 8.16 MB
-
 Fortitude Valley and CBD from Geen Square level 3 DSCF0022.jpg 3,648 × 2,736; 2.52 MB
-
 Fortitude Valley and CBD from Geen Square level 3 DSCF0023.jpg 3,648 × 2,736; 2.45 MB
-
 Fortitude Valley and CBD from Geen Square level 3 DSCF0026.jpg 3,648 × 2,736; 4.68 MB
-
 Fortitude Valley and CBD from Geen Square level 3 DSCF0029.jpg 3,648 × 2,736; 4.74 MB
-
 Fortitude Valley and CBD from Geen Square level 3 DSCF0030.jpg 3,648 × 2,736; 4.78 MB
-

-

-

-
 George St at dawn George St Brisbane P1140840.jpg 3,000 × 4,000; 7.85 MB
-
 George St at sunrise from Queen St Mall Brisbane P1160035.jpg 3,000 × 4,000; 7.58 MB
-
 Golden Triangle Buildings Brisbane City from Story Bridge P1230445.jpg 3,000 × 4,000; 9.77 MB
-
 Golden Triangle buildings from CityCat Kurilpa Petrie Bight Brisbane River P1250148.jpg 4,000 × 3,000; 7.7 MB
-
 Golden Triangle buildings from CityCat Kurilpa Petrie Bight Brisbane River P1380759.jpg 4,000 × 3,000; 9.65 MB
-
 Golden Triangle towers from CityCat Town Reach Brisbane River P1170263.jpg 4,000 × 3,000; 9.8 MB
-
 Golden Triangle towers from CityCat Town Reach Brisbane River P1170264.jpg 4,000 × 3,000; 9.98 MB
-
 Gotham City through the urban canyon, George and Ann Sts Brisbane DSCF7610.jpg 2,448 × 3,264; 2.45 MB
-
 Highrise residential buildings from St Pauls Tce Fortitude Valley P1170791.jpg 4,000 × 3,000; 12.23 MB
-
 Newstead Fortitude Valley and Brisbane City from Bartley's Hill Hamilton IMGP4636.jpg 4,288 × 2,848; 8.39 MB
-
 North Bank buildings from Gallery of Modern Art South Brisbane P1300549.jpg 4,000 × 3,000; 9.49 MB
-
 North Bank buildings from Gallery of Modern Art South Brisbane P1300550.jpg 4,000 × 3,000; 10.03 MB
-
 North Bank buildings from Gallery of Modern Art South Brisbane P1300551.jpg 3,000 × 4,000; 9.36 MB
-
 North Bank buildings from Gallery of Modern Art South Brisbane P1300568.jpg 4,000 × 3,000; 9.82 MB
-
 North Bank buildings from Gallery of Modern Art South Brisbane P1300572.jpg 4,000 × 3,000; 9.31 MB
-
 North Quarter towers from May St Brisbane P1170406.jpg 4,000 × 3,000; 11 MB


