Category:Auckland Harbour Bridge
Vai alla navigazione
Vai alla ricerca
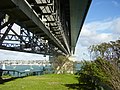
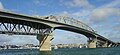
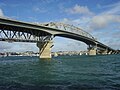
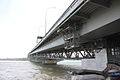
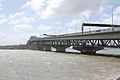
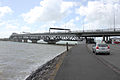
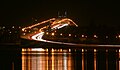
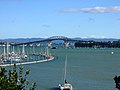
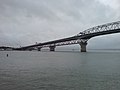
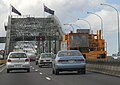
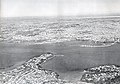
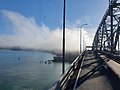
English: The Auckland Harbour Bridge is an eight-lane box truss motorway bridge over the Waitemata Harbour, joining St Marys Bay in Auckland with Northcote in North Shore City, New Zealand. The bridge is part of State Highway 1 and the Auckland Northern Motorway. It is the second-longest road bridge in New Zealand, and the longest in the North Island.
road bridge in Auckland, New Zealand  | |||||
| Carica un file multimediale | |||||
| Istanza di |
| ||||
|---|---|---|---|---|---|
| Materiale usato | |||||
| Luogo | Auckland, Nuova Zelanda | ||||
| Attraversa | |||||
| Permette il passaggio di | |||||
| Data di fondazione o creazione |
| ||||
| Data di apertura ufficiale |
| ||||
| Lunghezza |
| ||||
 | |||||
Sottocategorie
Questa categoria contiene le 5 sottocategorie indicate di seguito, su un totale di 5.
S
- Sulphur Beach (9 F)
File nella categoria "Auckland Harbour Bridge"
Questa categoria contiene 67 file, indicati di seguito, su un totale di 67.
-
 0723 09 harbour bridge sunset.jpg 1 024 × 768; 142 KB
-
 Auckand Harbour Bridge - panoramio.jpg 3 984 × 2 345; 4,42 MB
-
 Auckland Bridge from Mount Victoria.jpg 5 616 × 3 620; 8,49 MB
-
 Auckland City at Night - Flickr - 111 Emergency (2).jpg 1 600 × 670; 148 KB
-
 Auckland City skyline from Auckland Harbour Bridge.jpg 2 525 × 2 128; 1,14 MB
-
 Auckland City Skyscape from Auckland Harbour Bridge.jpg 3 691 × 2 529; 1,79 MB
-
 Auckland City, Harbour Bridge ^ Skytower at night - Flickr - 111 Emergency.jpg 1 600 × 1 065; 803 KB
-
 Auckland Habour Bridge (9373883541).jpg 2 272 × 1 704; 863 KB
-
 Auckland Habour Bridge (9400174852).jpg 2 272 × 1 704; 832 KB
-
 Auckland Habour Bridge (9400179766).jpg 2 272 × 1 704; 843 KB
-
 Auckland Habour Bridge (9406788264).jpg 2 272 × 1 704; 844 KB
-
 Auckland Harbour Bridge (14232548292).jpg 1 686 × 805; 1 022 KB
-
 Auckland Harbour Bridge (9228516270).jpg 2 272 × 1 704; 839 KB
-
 Auckland Harbour Bridge (9380408897) (cropped).jpg 2 272 × 1 041; 498 KB
-
 Auckland Harbour Bridge (9380408897).jpg 2 272 × 1 704; 843 KB
-
 Auckland Harbour Bridge - panoramio.jpg 2 048 × 1 536; 2,13 MB
-
 Auckland Harbour Bridge 0780 (9977688826) (2).jpg 1 600 × 1 067; 1,23 MB
-
 Auckland Harbour Bridge 0802 (9977615435) (3).jpg 1 600 × 1 067; 879 KB
-
 Auckland Harbour Bridge 0813 (9977615455) (4).jpg 1 600 × 1 067; 1,09 MB
-
 Auckland Harbour Bridge 0820 (9977643204).jpg 1 600 × 1 067; 1,01 MB
-
 Auckland Harbour Bridge aerial.jpg 4 000 × 2 248; 2,58 MB
-
 Auckland Harbour Bridge at night.jpg 3 456 × 2 304; 1,03 MB
-
 Auckland Harbour Bridge at Night.jpg 3 834 × 2 252; 887 KB
-
 Auckland Harbour Bridge Deck.jpg 1 600 × 880; 250 KB
-
 Auckland Harbour Bridge Details 01.jpg 1 600 × 1 200; 1,09 MB
-
 Auckland Harbour Bridge Details 02.jpg 1 200 × 1 600; 1,14 MB
-
 Auckland Harbour Bridge Details 03.jpg 1 600 × 1 200; 951 KB
-
 Auckland Harbour Bridge Extentsions (1969) (29045264036).jpg 2 480 × 3 187; 661 KB
-
 Auckland Harbour Bridge from Devonport 2004.jpg 1 024 × 768; 162 KB
-
 Auckland Harbour Bridge From Sentinel Bay.jpg 5 616 × 3 744; 11,46 MB
-
 Auckland Harbour Bridge from Sentinel Bay.jpg 5 567 × 3 131; 9,84 MB
-
 Auckland Harbour Bridge Girder.jpg 1 200 × 1 600; 433 KB
-
 Auckland Harbour Bridge in January 2009.jpg 2 467 × 1 774; 990 KB
-
 Auckland Harbour Bridge South.jpg 1 600 × 1 200; 330 KB
-
 Auckland Harbour Bridge Sunset (cropped).jpg 2 860 × 1 354; 1,7 MB
-
 Auckland Harbour Bridge Sunset.jpg 2 860 × 1 800; 2,36 MB
-
 Auckland Harbour Bridge Underside - Stokes Point.jpg 4 608 × 3 456; 6,97 MB
-
 Auckland Harbour Bridge Westhaven (9229162238).jpg 2 272 × 1 704; 866 KB
-
 Auckland Harbour Bridge With Flag.jpg 800 × 600; 146 KB
-
 Auckland Harbour Bridge, Auckland, New Zealand.jpg 2 363 × 1 771; 892 KB
-
 Auckland Harbour Bridge, NASA World Wind.jpg 1 200 × 760; 467 KB
-
 Auckland Harbour Bridge, New Zealand, 11 Nov. 2010 - Flickr - PhillipC (1).jpg 3 922 × 2 404; 2,34 MB
-
 Auckland Harbour Bridge, New Zealand, 11 Nov. 2010 - Flickr - PhillipC.jpg 3 876 × 2 404; 1,8 MB
-
 Auckland Harbour Bridge.jpg 960 × 1 280; 167 KB
-
 Auckland Harbour View 16 (5642269543).jpg 5 192 × 3 467; 8,94 MB
-
 Auckland skyline from harbour.png 2 437 × 1 641; 4,9 MB
-
 Auckland-3636.jpg 900 × 1 200; 815 KB
-
 Barrier Transfer Machine Auckland.JPG 399 × 495; 25 KB
-
 Barrier Transfer Machine on the Auckland Harbour Bridge 01.jpg 600 × 450; 81 KB
-
 Barrier Transfer Machine on the Auckland Harbour Bridge.jpg 1 200 × 847; 239 KB
-
 Below Auckland Harbour Bridge Hossen27.jpg 2 592 × 1 944; 2,62 MB
-
 Bridge shore (explored) - Flickr - hoodoo youdo.jpg 2 584 × 3 841; 4,38 MB
-
 Central Span Of Auckland Harbour Bridge.jpg 1 600 × 1 200; 991 KB
-
-

-
 Harbour Bridge Abutment Cage.jpg 1 600 × 1 200; 1,26 MB
-
 Harbour Bridge Sideways 01.jpg 1 600 × 1 200; 1,08 MB
-
 Harbour Bridge Sideways 02.jpg 1 600 × 1 200; 1,02 MB
-

-
 Three lives lost building the Auckland Habour Bridge (9397417487).jpg 2 272 × 1 704; 842 KB
-
 Traffic on the Auckland Harbour Bridge.jpg 768 × 1 024; 371 KB
-
 Underside of the Auckland Harbour Bridge.jpg 2 560 × 1 920; 411 KB
-
 View from Mount Victoria Reserve, Auckland - panoramio (4).jpg 2 048 × 1 151; 582 KB
-
 View from Northcote Point (1950s).jpg 1 999 × 1 359; 309 KB
-
 Waitemata Auckland Harbour 47.jpg 860 × 600; 96 KB
-
 Waitemata harbour fog 20210503 085704.jpg 4 032 × 3 024; 3,12 MB
-
 Yacht and Auckland Harbour Bridge (5642160429) (2).jpg 5 184 × 3 456; 10,82 MB


.jpg)


.jpg)
.jpg)
.jpg)
.jpg)
.jpg)
.jpg)
_(cropped).jpg)
.jpg)

_(2).jpg)
_(3).jpg)
_(4).jpg)
.jpg)


_(29045264036).jpg)


.jpg)


.jpg)


.jpg)


.jpg)


_-_Flickr_-_hoodoo_youdo.jpg)

.jpg)


_(28247424510).jpg)
.jpg)


.jpg)
.jpg)


_(2).jpg)