Category:Fremantle Harbour cranes
Jump to navigation
Jump to search
English: Cranes used in w:Fremantle Harbour - current and historic
Subcategories
This category has only the following subcategory.
C
Media in category "Fremantle Harbour cranes"
The following 55 files are in this category, out of 55 total.
-
 CMA CGM Bellini, Fremantle, January 2021 01.jpg 3,264 × 2,448; 2.22 MB
-
 CMA CGM Bellini, Fremantle, January 2021 02.jpg 3,264 × 2,448; 2.65 MB
-
 CMA CGM Bellini, Fremantle, January 2021 03.jpg 3,264 × 2,448; 2.18 MB
-
 Container crane (32591661474).jpg 4,608 × 3,072; 4.52 MB
-
 Container crane (33433324735).jpg 4,565 × 3,043; 1.46 MB
-
 Container cranes (33306441001).jpg 4,608 × 3,072; 5.57 MB
-
 Crane (32618107303).jpg 3,072 × 4,608; 5.58 MB
-
 Crane (33276542552).jpg 4,608 × 3,072; 4.16 MB
-
 Crane at Fremantle Port (33412757875).jpg 1,997 × 2,903; 705 KB
-
 Crane at North Fremantle, July 2023 01.jpg 4,608 × 3,456; 2.85 MB
-
 Crane at North Fremantle, July 2023 02.jpg 3,456 × 4,608; 3.26 MB
-
 Crane at North Fremantle, July 2023 03.jpg 3,456 × 4,608; 2.89 MB
-
 Crane No P4 (33049055350).jpg 4,608 × 3,072; 4.51 MB
-
 Crane on north quay with passing police boat.jpg 3,035 × 4,582; 3.73 MB
-
 Crane wheels (33303857081).jpg 4,608 × 3,072; 5.33 MB
-
 Crane wheels (33305031381).jpg 4,608 × 3,072; 5.47 MB
-
 Crane wheels at the end of north wharf (33051452810).jpg 4,608 × 3,072; 5.99 MB
-
 Cranes (33048997040).jpg 3,072 × 4,608; 5.35 MB
-
 Cranes (33391889626).jpg 4,289 × 2,861; 2.15 MB
-
 Cranes (33432135725).jpg 4,608 × 3,072; 6.12 MB
-
 Cranes at Fremantle Port (33257182732).jpg 3,227 × 2,154; 891 KB
-
 E Shed crane.jpg 2,340 × 4,160; 3.68 MB
-
 Fremantle Harbour (33366984246).jpg 3,037 × 1,900; 875 KB
-
 Fremantle Harbour cranes (33285832101).jpg 3,097 × 1,944; 832 KB
-
 Fremantle Harbour cranes seen from Rockingham, July 2024 01.jpg 4,608 × 3,456; 3.35 MB
-
 Fremantle Harbour cranes seen from Rockingham, July 2024 02.jpg 4,608 × 2,592; 3.05 MB
-
 Fremantle Harbour historic crane.jpg 683 × 1,024; 155 KB
-
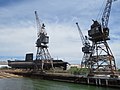
 Fremantle submarine base cranes, Western Australian Maritime Museum, January 2021.jpg 2,448 × 3,264; 2.14 MB
-
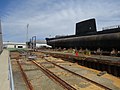
 HMAS Ovens, West Australian Maritime Museum, January 2021 01.jpg 3,264 × 2,448; 2.08 MB
-
 HMAS Ovens, West Australian Maritime Museum, January 2021 02.jpg 3,264 × 2,448; 2.14 MB
-
 HMAS Ovens, West Australian Maritime Museum, January 2021 03.jpg 3,264 × 2,448; 1.89 MB
-
 HMAS Ovens, West Australian Maritime Museum, January 2021 04.jpg 3,264 × 2,448; 1.78 MB
-
 HMAS Ovens, West Australian Maritime Museum, January 2021 05.jpg 3,264 × 2,448; 1.75 MB
-
 Looking up at a crane (33276534082).jpg 3,072 × 4,608; 1.37 MB
-
 Looking up at a crane (33303861241).jpg 2,593 × 4,224; 987 KB
-
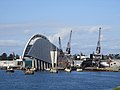
 Margaret River Bridge, Fremantle, January 2021.jpg 3,264 × 2,448; 2.56 MB
-

-

-
 North quay cranes March 2017.jpg 4,651 × 2,541; 2.79 MB
-
 North Quay edge from east.jpg 1,280 × 786; 246 KB
-
 North Quay edge from west.jpg 3,221 × 1,171; 900 KB
-
 North side of the harbour (33051508360).jpg 4,608 × 3,072; 6.42 MB
-
 Power cable on a crane (33304878011).jpg 3,072 × 4,608; 4.92 MB
-
 Power cable reel on a crane (33392878016).jpg 4,608 × 3,072; 4.68 MB
-
 Swandocks (33366986796).jpg 2,680 × 2,000; 750 KB
-
 The northern side of the harbour changes direction (33050218090).jpg 4,608 × 3,072; 5.91 MB
-
 Victoria Quay gnangarra-13.jpg 4,206 × 2,786; 6.55 MB
-
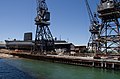
 Western Australian Maritime Museum, HMAS Ovens and submarine slipway, September 2020 01.jpg 4,608 × 3,456; 3.94 MB
-
 Western Australian Maritime Museum, HMAS Ovens and submarine slipway, September 2020 02.jpg 4,608 × 3,456; 3.99 MB
-
 Western Australian Maritime Museum, HMAS Ovens and submarine slipway, September 2020 03.jpg 3,648 × 2,736; 2.63 MB
-
 Western Australian Maritime Museum, HMAS Ovens and submarine slipway, September 2020 04.jpg 3,648 × 2,736; 2.58 MB
-

-
 Western Australian Maritime Museum, HMAS Ovens and submarine slipway, September 2020 06.jpg 3,648 × 2,736; 2.97 MB
-
 Western Australian Maritime Museum, HMAS Ovens and submarine slipway, September 2020 07.jpg 3,648 × 2,736; 2.92 MB
-
 Wharf side and crane feet on North Quay.jpg 1,280 × 458; 226 KB


.jpg)
.jpg)
.jpg)
.jpg)
.jpg)
.jpg)


.jpg)

.jpg)
.jpg)
.jpg)
.jpg)
.jpg)
.jpg)
.jpg)

.jpg)
.jpg)


.jpg)
.jpg)


.jpg)
.jpg)
.jpg)
.jpg)
.jpg)


