Category:Gloucester Road, Causeway Bay
Jump to navigation
Jump to search
Subcategories
This category has the following 9 subcategories, out of 9 total.
Media in category "Gloucester Road, Causeway Bay"
The following 88 files are in this category, out of 88 total.
-
 Cannon Street bus stop 01-04-2022(2).jpg 4,032 × 3,024; 4.07 MB
-
 Cannon Street bus stop 01-04-2022.jpg 4,032 × 3,024; 4.04 MB
-
 HK Causeway Bay 銅鑼灣 CWB 百德新街 Paterson Street January 2019 SSG 11.jpg 3,264 × 2,448; 3.09 MB
-
 HK Causeway Bay 銅鑼灣 CWB 百德新街 Paterson Street January 2019 SSG 38.jpg 3,264 × 2,448; 3.2 MB
-
 HK Causeway Bay 銅鑼灣 CWB 百德新街 Paterson Street January 2019 SSG 40.jpg 3,264 × 2,448; 2.86 MB
-
 HK Causeway Bay 銅鑼灣 CWB 百德新街 Paterson Street January 2019 SSG 41.jpg 3,264 × 2,448; 2.88 MB
-
 HK Causeway Bay 銅鑼灣 CWB 百德新街 Paterson Street January 2019 SSG 42.jpg 3,264 × 2,448; 2.38 MB
-
 HK Causeway Bay 銅鑼灣 CWB 百德新街 Paterson Street January 2019 SSG 43.jpg 3,264 × 2,448; 2.33 MB
-
 HK Causeway Bay 銅鑼灣 CWB 百德新街 Paterson Street January 2019 SSG 44.jpg 3,264 × 2,448; 2.11 MB
-
 HK Causeway Bay 銅鑼灣 CWB 百德新街 Paterson Street January 2019 SSG 46.jpg 3,264 × 2,448; 2.38 MB
-
 HK Causeway Bay 銅鑼灣 CWB 百德新街 Paterson Street January 2019 SSG 50.jpg 3,264 × 2,448; 2.47 MB
-
 HK Causeway Bay 銅鑼灣 CWB 百德新街 Paterson Street January 2019 SSG 51.jpg 2,448 × 3,264; 2.86 MB
-
 HK Causeway Bay 銅鑼灣 CWB 百德新街 Paterson Street January 2019 SSG 52.jpg 2,448 × 3,264; 2.74 MB
-
 HK Causeway Bay 銅鑼灣 CWB 百德新街 Paterson Street January 2019 SSG 53.jpg 3,264 × 2,448; 2.71 MB
-
 HK CWB 2 Tai Hang Elevated Road.JPG 1,280 × 960; 847 KB
-
 HK CWB Causeway Bay Road 19 Yee Wo Street Lok Sing Centre July 2021 SS2.jpg 3,096 × 4,128; 4.35 MB
-
 HK CWB Causeway Bay Sugar Street Lok Sing Centre Gloucester Road shops March 2024 R12S.jpg 3,000 × 4,000; 3.96 MB
-
 HK CWB Causeway Bay Windsor House Gloucester Road flyover May 2017 IX1.jpg 2,048 × 1,368; 1.06 MB
-
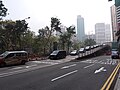
 HK CWB 銅鑼灣 Causeway Bay Gloucester Road flyover December 2021 Px3.jpg 4,000 × 3,000; 5.06 MB
-

-
 HK CWB 銅鑼灣 Causeway Bay 告士打道 262 Gloucester Road January 2022 Px3 08 COFCO Tower.jpg 4,000 × 3,000; 3.84 MB
-
 HK CWB 銅鑼灣 Causeway Bay 告士打道 262 Gloucester Road January 2022 Px3 09 COFCO Tower.jpg 3,000 × 4,000; 6.02 MB
-

-
 HK CWB 銅鑼灣 Causeway Bay 告士打道 Gloucester Road January 2022 Px3 01.jpg 3,000 × 4,000; 5.5 MB
-
 HK CWB 銅鑼灣 Causeway Bay 告士打道 Gloucester Road January 2022 Px3 02 bus stop signs.jpg 3,000 × 4,000; 5.87 MB
-
 HK CWB 銅鑼灣 Causeway Bay 告士打道 Gloucester Road January 2022 Px3 03 footbridge stairs.jpg 3,000 × 4,000; 4.92 MB
-
 HK CWB 銅鑼灣 Causeway Bay 告士打道 Gloucester Road January 2022 Px3 03 Percival Street.jpg 4,000 × 3,000; 5.23 MB
-
 HK CWB 銅鑼灣 Causeway Bay 告士打道 Gloucester Road January 2022 Px3 05 Percival Street.jpg 3,000 × 4,000; 5.32 MB
-
 HK CWB 銅鑼灣 Causeway Bay 告士打道 Gloucester Road January 2022 Px3 06 bus stop signs.jpg 3,000 × 4,000; 4.26 MB
-
 HK CWB 銅鑼灣 Causeway Bay 告士打道 Gloucester Road January 2022 Px3 10 bus stop signs.jpg 3,000 × 4,000; 5.92 MB
-
 HK CWB 銅鑼灣 Causeway Bay 告士打道 Gloucester Road January 2022 Px3 11 bus stop signs.jpg 4,000 × 3,000; 5.21 MB
-
 HK CWB 銅鑼灣 Causeway Bay 告士打道 Gloucester Road January 2022 Px3 12.jpg 3,000 × 4,000; 6.78 MB
-

-

-
 HK CWB 銅鑼灣 Causeway Bay 告羅士打道 212 The Gloucester Road address number November 2019 SS2.jpg 4,128 × 3,096; 5.53 MB
-

-
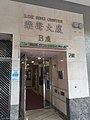
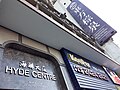 HK CWB 銅鑼灣 Causeway Bay 告羅士打道 223 Gloucester Road Hyde Centre November 2019 SS2.jpg 4,128 × 3,096; 3.28 MB
-
 HK CWB 銅鑼灣 Causeway Bay 告羅士打道 233 Gloucester Road November 2019 SS2 BOCOM after the war.jpg 4,128 × 3,096; 4.47 MB
-
-
-

-
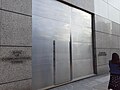
 HK CWB 銅鑼灣 Causeway Bay 告羅士打道 Gloucester Road building facade November 2019 SS2.jpg 2,576 × 1,932; 1.15 MB
-

-
-
 HK CWB 銅鑼灣 Causeway Bay 告羅士打道 Gloucester Road carpark n single lane November 2019 SS2 01.jpg 3,096 × 4,128; 4.41 MB
-

-
 HK CWB 銅鑼灣 Causeway Bay 告羅士打道 Gloucester Road footbridge November 2019 SS2 23.jpg 4,128 × 3,096; 3.27 MB
-

-
-

-

-
 HK CWB 銅鑼灣 Causeway Bay 告羅士打道 Gloucester Road Kingston Street October 2019 SS2 01.jpg 2,576 × 1,932; 1.53 MB
-
 HK CWB 銅鑼灣 Causeway Bay 告羅士打道 Gloucester Road Kingston Street October 2019 SS2 03.jpg 2,576 × 1,932; 1.29 MB
-
 HK CWB 銅鑼灣 Causeway Bay 告羅士打道 Gloucester Road Kingston Street October 2019 SS2 05.jpg 2,576 × 1,932; 1.61 MB
-
 HK CWB 銅鑼灣 Causeway Bay 告羅士打道 Gloucester Road Kingston Street October 2019 SS2 09.jpg 2,576 × 1,932; 1.61 MB
-

-
 HK CWB 銅鑼灣 Causeway Bay 告羅士打道 Gloucester Road KMBus stop signs November 2019 SS2 03.jpg 4,128 × 3,096; 3.65 MB
-
 HK CWB 銅鑼灣 Causeway Bay 告羅士打道 Gloucester Road November 2019 SS2 19.jpg 4,128 × 3,096; 3.05 MB
-
 HK CWB 銅鑼灣 Causeway Bay 告羅士打道 Gloucester Road October 2019 SS2 02.jpg 1,932 × 2,576; 1.42 MB
-
-
 HK CWB 銅鑼灣 Causeway Bay 告羅士打道 Gloucester Road public bus stop signs November 2019 SS2 20.jpg 3,096 × 4,128; 4.16 MB
-
-

-
-
-
-
 HK CWB 銅鑼灣 Causeway Bay 告羅士打道 Gloucester Road Wilson Parking November 2019 SS2 08.jpg 4,128 × 3,096; 4.48 MB
-

-

-

-

-

-
 HK 過海隧道巴士107線 Bus route 107 view CWB 告士打道 Gloucester Road Nov 2019 SS2 01.jpg 4,128 × 3,096; 3.26 MB
-
 HK 過海隧道巴士107線 Bus route 107 view CWB 告士打道 Gloucester Road Nov 2019 SS2 03.jpg 3,096 × 4,128; 3.53 MB
-
 HK 過海隧道巴士107線 Bus route 107 view CWB 告士打道 Gloucester Road Nov 2019 SS2 05.jpg 4,128 × 3,096; 3.75 MB
-
 HK 過海隧道巴士107線 Bus route 107 view CWB 告士打道 Gloucester Road Nov 2019 SS2 07.jpg 2,576 × 1,932; 1.43 MB
-
 HK 過海隧道巴士107線 Bus route 107 view CWB 告士打道 Gloucester Road Nov 2019 SS2 08.jpg 2,576 × 1,932; 1.36 MB
-
 HK 過海隧道巴士107線 Bus route 107 view CWB 告士打道 Gloucester Road Nov 2019 SS2 09.jpg 2,576 × 1,932; 1.2 MB
-
 HK 過海隧道巴士107線 Bus route 107 view CWB 告士打道 Gloucester Road Nov 2019 SS2 10.jpg 2,576 × 1,932; 1.12 MB
-
 HK 過海隧道巴士107線 Bus route 107 view CWB 告士打道 Gloucester Road Nov 2019 SS2 11.jpg 2,576 × 1,932; 1.15 MB
-
 HK 過海隧道巴士107線 Bus route 107 view CWB 告士打道 Gloucester Road Nov 2019 SS2 12.jpg 2,576 × 1,932; 1.15 MB
-
 HK 過海隧道巴士107線 Bus route 107 view CWB 告士打道 Gloucester Road Nov 2019 SS2 15.jpg 2,576 × 1,932; 1.55 MB
-
 HK 過海隧道巴士107線 Bus route 107 view CWB 告士打道 Gloucester Road Nov 2019 SS2 16.jpg 2,576 × 1,932; 1.6 MB
-

-

-

-

-

.jpg)


