Category:Mesopotamian campaign
Jump to navigation
Jump to search
English: Media relating to the military operations in Mesopotamia (in the area today known as Iraq) of World War I (1914–1918).
1914 World War I military campaign  | |||||
| Upload media | |||||
| Instance of | |||||
|---|---|---|---|---|---|
| Part of | |||||
| Location | Mesopotamia, Fertile Crescent | ||||
| Point in time |
| ||||
| Start time |
| ||||
| End time |
| ||||
| |||||
Subcategories
This category has the following 9 subcategories, out of 9 total.
Media in category "Mesopotamian campaign"
The following 47 files are in this category, out of 47 total.
-
 12pdr12cwtAAgunBargeMesopotamiaWWI.jpeg 450 × 263; 33 KB
-
 18pdrMesopotamiaMarch1917.jpg 800 × 464; 44 KB
-
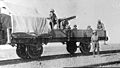 2pdrVickersPomPomRailwayMesopotamiaWWI.jpeg 451 × 255; 75 KB
-
 2pounderVickersCrewMesopotamia1918Front.jpg 800 × 1,034; 167 KB
-
 60 pounder gun firing in Mesopotamia WWI IWM Q 24285.jpg 800 × 463; 39 KB
-
 92nd Punjabis, Mesopotamia, c. 1916.jpg 1,518 × 1,064; 239 KB
-

-
 A Brcs and Osjj Officer in Mesopotamia Art.IWMART3836.jpg 530 × 800; 60 KB
-
 Amandus Faure (on the left) on the Mesopotamian Front, 1915.png 1,028 × 1,351; 1.53 MB
-

-

-

-

-

-
 Detail of Xmas card from British Mesopotamian Expeditionary Force, 1917.jpg 1,416 × 1,673; 2.99 MB
-
 Dorsets at 1st Kut ( 28 Sept 1915).jpg 447 × 616; 92 KB
-
 Fenton Aylmer VC.jpg 300 × 509; 29 KB
-
 Field Guns In Action at Sheikh Saad.jpg 432 × 205; 21 KB
-
 General Cobbe, Samarra, 1917, V 031.jpg 640 × 1,008; 111 KB
-

-
 Gws basra 01.jpg 1,100 × 577; 32 KB
-
 Halil Kut.png 421 × 598; 300 KB
-
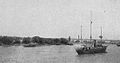
 HMS Mantis - Project Gutenberg eText 18031.jpg 500 × 309; 12 KB
-
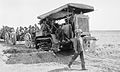 HoltTractorMesopotamiaWWI.jpg 800 × 478; 65 KB
-
 HoltTractorTowing6inchHowitzerMesopotamia1918.jpeg 450 × 338; 71 KB
-
 Hospital Ship 1 on Tigris (1916).jpg 699 × 539; 55 KB
-

-
 Indian Cavalry near Tigris.jpg 919 × 581; 276 KB
-

-
 Indian machine gunners at the Battle of Shaiba 1915.png 416 × 574; 320 KB
-
-
 Indian troops board bellums in Basrah 1915.png 828 × 582; 664 KB
-

-
 Indian Troops in New Street, Baghdad, 11 March 1917.jpg 960 × 763; 124 KB
-
 Indian troops in Samarra 1918.jpg 800 × 470; 62 KB
-
 Indian troops in the firing line, Mesopotamia, January 1915.jpg 960 × 713; 167 KB
-
 Krieg in Mesopotanien.jpg 1,396 × 1,071; 546 KB
-
 Meso Campaign.jpg 1,677 × 948; 139 KB
-
 Mesopotamian campaign 6th Army field HQ.png 350 × 263; 168 KB
-
 Mesopotamian campaign General Townshend.png 300 × 376; 66 KB
-

-
 QF3pdrHotchkissMesopotamia1917.jpg 800 × 446; 28 KB
-
 ScientificAmerican1917-11-03.jpg 650 × 952; 129 KB
-

-
 THE CAMPAIGN IN MESOPOTAMIA DURING THE FIRST WORLD WAR Q24367.jpg 800 × 478; 72 KB
-
 Turkish Trench at Es Sinn.jpg 404 × 227; 42 KB
-
 VickersQF2pdrPomPomAAgunMesopotamia1918.jpeg 430 × 254; 71 KB


_on_the_Mesopotamian_Front,_1915.png)


.jpg)


.jpg)


.jpg)