Category:Royal Australian Navy
Jump to navigation
Jump to search
naval warfare branch of the Australian Defence Force  | |||||
| Upload media | |||||
| Instance of | |||||
|---|---|---|---|---|---|
| Location | Canberra, Australian Capital Territory, AUS | ||||
| Item operated |
| ||||
| Headquarters location |
| ||||
| Inception |
| ||||
| Replaces |
| ||||
| official website | |||||
| |||||
 | |||||


Subcategories
This category has the following 9 subcategories, out of 9 total.
Media in category "Royal Australian Navy"
The following 115 files are in this category, out of 115 total.
-
 Badge of the Royal Australian Navy.svg 601 × 1,048; 204 KB
-
 Logo of the Royal Australian Navy.svg 601 × 1,361; 205 KB
-
 'Boys who repaired the funnel' (27374083055).jpg 1,200 × 898; 161 KB
-
 120713-N-ZZ999-004 (7591281596).jpg 2,100 × 1,397; 2.4 MB
-
 130714-O-ZZ999-002-AU (9314785906).jpg 3,600 × 2,089; 1.29 MB
-
 130714-O-ZZ999-003-AU (9305239467).jpg 3,600 × 2,971; 1,001 KB
-

-
-

-
 A sinking Italian CANT Z.501 seaplane with lifeboat (27374081915).jpg 1,200 × 831; 148 KB
-
-

-

-

-
-
 AppendectomyShropshire VirgilReilly.png 2,149 × 1,663; 4.43 MB
-
 AppendectomyShropshire.png 760 × 601; 497 KB
-
 ASROC-splashdown-corrected.svg 755 × 599; 121 KB
-

-
 Australian sailors off Bendigo coming from Port Moresby, 1942 (8180820211).jpg 2,475 × 3,629; 931 KB
-
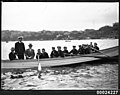 Australian Sea Cadets in an open boat, 1909-1930 (8204786670).jpg 1,142 × 906; 152 KB
-
 Australian Six-Sided Uckers Board.jpg 2,048 × 1,536; 1.1 MB
-

-
 Australian troop carrier in rough seas off New Guinea during World War 2 (6991920159).jpg 2,409 × 1,584; 1.54 MB
-

-

-

-
 Brick building above Hungry Beach.jpg 3,195 × 2,302; 2.48 MB
-
 Clearance Diving Team 1 - HYDRACRAB 2019.png 1,000 × 667; 1.61 MB
-

-

-

-
 Exercise Bersama Lima 18 PHOTEX 1.jpg 3,600 × 2,400; 7.03 MB
-
 Exercise Bersama Lima 18 PHOTEX 2.jpg 3,600 × 2,400; 9.62 MB
-
-
 Flag of the Australian Navy Board.svg 1,200 × 600; 27 KB
-
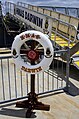 Gangway of HMAS Darwin.jpg 3,264 × 4,928; 2.58 MB
-
 George gosse defusing mine.jpg 800 × 586; 76 KB
-
 H.M.A.S. Polaris.jpg 8,073 × 4,241; 16.05 MB
-
 HMAS Adelaide (9916459453607636).jpg 1,600 × 1,177; 380 KB
-
 HMAS Anzac, Port Jackson, Sydney, c. 1925.jpg 3,000 × 1,798; 3.32 MB
-
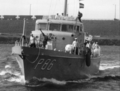 HMAS Archer August 1968.png 1,429 × 1,080; 962 KB
-
 HMAS Australia, 1913 Charles Dixon.jpg 1,058 × 633; 557 KB
-
 HMAS Brisbane - 070425 Anzac Day March, Adelaide St, Brisbane, Queensland, Australia.jpg 2,592 × 1,944; 1.23 MB
-
 HMAS Condamine in 1949 (9916483003607636).jpg 1,600 × 1,147; 388 KB
-
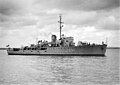 HMAS Cowra corvette (9916467733607636).jpg 1,600 × 1,136; 376 KB
-
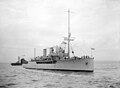 HMAS Geranium (9916498703607636).jpg 1,600 × 1,172; 342 KB
-
 HMAS KURAMIA.jpg 823 × 532; 100 KB
-
 HMAS Moreton.jpg 2,322 × 4,128; 2.17 MB
-
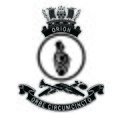 HMAS ORION BADGE.jpg 501 × 501; 219 KB
-
-
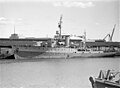 HMAS Wagga J315 (9916462263607636).jpg 1,600 × 1,172; 376 KB
-
-
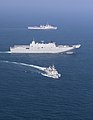
 Kapal terbesar Angkatan Laut Australia HMAS Canberra.jpg 6,016 × 4,016; 10.63 MB
-
 Map of HMAS Sydney (II) winter cruise, 1939 (27340403456).jpg 1,200 × 1,038; 255 KB
-
 Men and officers on the deck of SYDNEY (7799428154).jpg 2,623 × 1,924; 2.34 MB
-
 Mrs Elsa Evans posing on the deck of HNLMS JAVA, 10 October 1930 (7284699788).jpg 2,618 × 2,126; 310 KB
-
 MSO Wallaroo Y-299.jpg 4,032 × 2,130; 2.95 MB
-

-
 Naval officers and sailors of watching the sinking of HMAS TORRENS I (8661185013).jpg 2,930 × 2,362; 224 KB
-
 Naval officers and sailors of watching the sinking of HMAS TORRENS I (8669685009).jpg 2,974 × 2,362; 228 KB
-
 Outside a shop in Singapore, 1940 (26766580924).jpg 827 × 1,200; 144 KB
-
 PaintedAtSea.png 1,251 × 761; 1.05 MB
-
 Photograph of the Naval hockey team (7654401402).jpg 1,860 × 1,092; 342 KB
-
 Playing football at HMAS Creswell (Jarvis Bay naval base) (26766586224).jpg 1,200 × 946; 137 KB
-
 Port Glaud to Conception Island, the Seychelles (27098454390).jpg 1,073 × 680; 276 KB
-

-

-
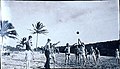 Rugby as it should be played (7673691854).jpg 546 × 313; 44 KB
-
 Sailors with demolition charges on HMAS AUSTRALIA I (8527145556).jpg 2,743 × 2,126; 219 KB
-
 Seaplanes on aircraft carrier HMAS SYDNEY (7829211102).jpg 1,263 × 922; 111 KB
-
 Seymour Vietnam Veterans 1.jpg 2,560 × 1,920; 1.18 MB
-
 Seymour Vietnam Veterans 2.jpg 2,560 × 1,920; 1.15 MB
-
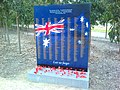 Seymour Vietnam Veterans 3.jpg 2,560 × 1,920; 1.52 MB
-
 Seymour Vietnam Veterans 4.jpg 2,560 × 1,920; 1.35 MB
-
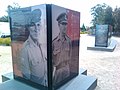 Seymour Vietnam Veterans 5.jpg 2,560 × 1,920; 1.11 MB
-
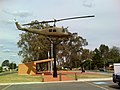 Seymour Vietnam Veterans 6.jpg 2,560 × 1,920; 1.21 MB
-
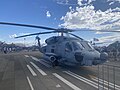 Sikorsky SH-60 Seahawk at 2023 Avalon Airshow (1).jpg 4,032 × 3,024; 2.05 MB
-
 Sikorsky SH-60 Seahawk at 2023 Avalon Airshow (2).jpg 4,032 × 3,024; 2.04 MB
-
 SLNSW 10583 Commander Hammer speaking.jpg 1,400 × 1,072; 206 KB
-
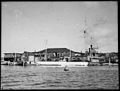 SLNSW 22402 The Navy Leagues Sydney Training Depot taken for Mr Len Forsythe.jpg 1,400 × 1,063; 299 KB
-
 SLNSW 22410 The Navy Leagues Sydney Training Depot taken for Mr Len Forsythe.jpg 795 × 1,050; 239 KB
-
 SLNSW 22412 The Navy Leagues Sydney Training Depot taken for Mr Len Forsythe.jpg 1,400 × 1,050; 304 KB
-
-

-
-
 SLNSW 22501 Navy Leagues Sydney Training Depot taken for Mr Len Forsythe.jpg 775 × 1,050; 213 KB
-
 SLNSW 24188 Army Navy and Air Force parade.jpg 1,400 × 1,049; 366 KB
-
 SLNSW 24831 Navy League Depot.jpg 1,400 × 1,040; 298 KB
-
 SLNSW 28759 Captain Bell Navy League childrens Christmas Party at Taronga Park.jpg 1,400 × 1,078; 361 KB
-
 SLNSW 28762 Captain Bell Navy League childrens Christmas Party at Taronga Park.jpg 1,400 × 1,069; 439 KB
-

-
-

-
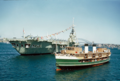 Sydney ferry NORTH HEAD alongside HMAS VENGEANCE 3 March 1954.png 1,818 × 1,228; 3.21 MB
-
 The Australian Sailor Monument June 2018.jpg 3,036 × 4,048; 4.03 MB
-

-
 The roots and evolution of the Royal Australian Navy (IA therootsndevolut109453500).pdf 1,275 × 1,650, 116 pages; 341 KB
-
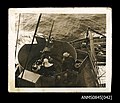 Three crew in the gun turret (27374076085).jpg 1,200 × 1,027; 216 KB
-

-

-
-

-

-

-

-
 US Navy 100712-N-6477M-734 Royal Australian Navy Band plays aboard USS Cleveland.jpg 4,288 × 2,848; 5.45 MB
-
-

-

-
 View of battlefleet taken through the sight of a Lewis gun (26767516073).jpg 1,200 × 850; 127 KB
-
 Withdrawal of Naval Forces in Malaysian Borneo (AWM P02429.002).JPG 640 × 480; 209 KB
-
 Women’s Emergency Signalling Corps members at Castle Hill c1939.png 698 × 505; 653 KB
-
 Youd be proud of the kids VirgilReilly.png 2,015 × 901; 1.82 MB
-
 Youd be proud of the kids.png 1,063 × 493; 505 KB


.jpg)
.jpg)
.jpg)
.jpg)

.jpg)
.jpg)
.jpg)
.jpg)
.jpg)
.jpg)
.jpg)


.jpg)
.jpg)

.jpg)
.jpg)

,_11_February_1941_(4067562194).jpg)
.jpg)


.jpg)


.jpg)


.jpg)


.jpg)
.jpg)
.jpg)


_in_a_sea_battle_with_an_Italian_destroyer_in_November_1940_(26767533823).jpg)
.jpg)
_with_HMAS_Adelaide_(L01)_and_INS_Jalashwa_(L41)_during_a_joint_exercise.jpg)

_winter_cruise,_1939_(27340403456).jpg)
.jpg)
.jpg)

.jpg)
.jpg)
.jpg)
.jpg)

.jpg)
_(26766586224).jpg)
.jpg)
_refuelled_there_in_January_1941_(27303623761).jpg)
.jpg)
.jpg)
.jpg)
.jpg)


.jpg)
.jpg)


.jpg)

.jpg)


.jpg)
.jpg)
_Sailors_aboard_the_guided_missile_cruiser_USS_Normandy_(CG_60),_stand_side-by-side_to_honor_World_War_II_D-Day_veterans_during_an_early_evening_memorial_ceremony.jpg)
.jpg)
,_and_Rear_Adm._Carol_M._Pottenger,_commander.jpg)
_during_a_Deep_Sabr.jpg)
.jpg)
.jpg)


.jpg)


.jpg)
.JPG)


